Showing posts with label Memorable Seasons Design Team. Show all posts

Friday, January 7, 2011

Memorable Seasons Design Team Reveal and Online Crop News

This month the Designers at Memorable Seasons are revealing our projects in coordination with the Memorable Seasons Numbers Crop. The Crop begins today and runs through Sunday. I hope you join us for a weekend of crafty fun right here on the message boards!

Now for my monthly reveal...after working on so many holiday projects over the past couple of months, having an opportunity to create with products that remind me of summer fun was a real treat! I chose the Jillibean Soup Summer Squash Soup Collection and Jill also chose some great embellishments for me to use as well. The list of supplies from the Memorable Seasons store that I used for these layouts is available right here.
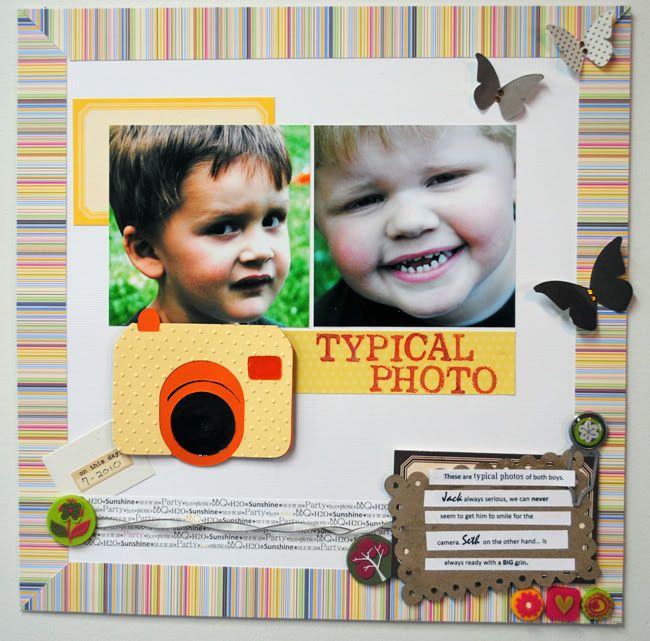
For my "Typical Photo" layout, I used my Cricut to create the camera die cut, embossed it with my Cuttlebug and added Glossy Accents to the lens to give it the shine of glass... unfortunately I didn't take a photo that shows that! Grrrr. :-)
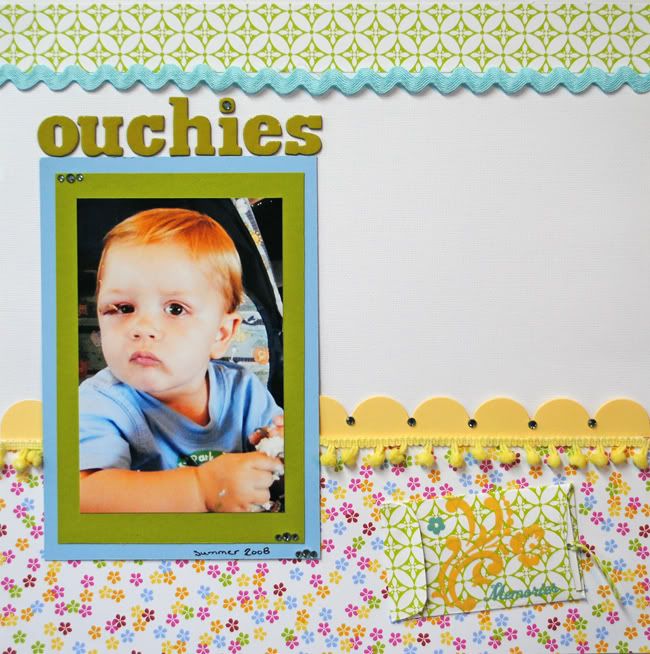
For my "Ouchies" Layout I chose to hide the journaling (which is a personal message to my grandson regarding surgery he had to remove a cyst from above his right eye) in an envelope I created from a plastic template. You saw the sneak peek for this layout on yesterday's post here at Runs With Scraps.

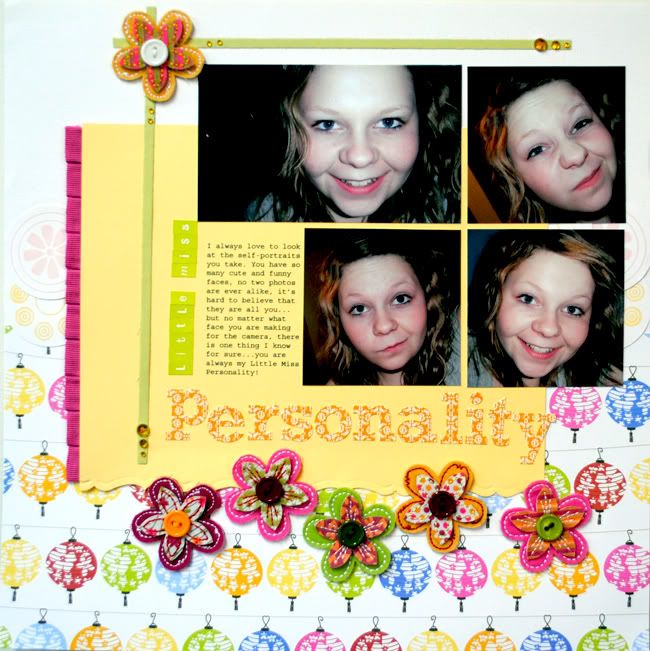
I've had the flowers I used in this layout for almost a year... I couldn't believe I finally found a place to use them (I had lost hope)...  See that, all good things come to those who wait. (sorta).

Join us for the Memorable Seasons New Year's Number Crop!! Beginning on Friday, January 7 through January 9, the Design Team will issue 12 challenges for the 12 months of the year. Each challenge will represent a month and will use the number of that month in a creative way to inspire your layout or card. Our Online Crop will last until Sunday night, but you will have until the following Sunday night (January 16) at midnight to complete your challenges. Points will be awarded for each challenge completed as well as the games that we play over the weekend. The person with the most points will be our winner! There will also be some fun RAK give aways, games, and great sale items at the online store too! Don't miss out on all the fun! Join us this weekend!

Thursday, January 6, 2011

Online Crop at Memorable Seasons This Weekend!

Join us for the Memorable Seasons New Year's Number Crop!! Beginning on Friday, January 7 through January 9, the Design Team will issue 12 challenges for the 12 months of the year. Each challenge will represent a month and will use the number of that month in a creative way to inspire your layout or card. Our Online Crop will last until Sunday night, but you will have until the following Sunday night (January 16) at midnight to complete your challenges. Points will be awarded for each challenge completed as well as the games that we play over the weekend. The person with the most points will be our winner! There will also be some fun RAK give aways, games, and great sale items at the online store too! Don't miss out on all the fun! Join us this weekend!

This weekend the Design Team will also reveal their montly projects created using products from the Memorable Season's Store. Here's a sneak peek of one of my layouts...


The sneak peeks are online now at the forum right here.  The big reveal happens tomorrow when we kick off the weekend crop.  Hope you join us!

Thursday, December 16, 2010

Warm Winter Wishes Card and Memorable Seasons

As I mentioned in earlier posts this month, a lot of stickers came in the Memorable Seasons Design Team Kit. Consequently, I haven't used this many stickers on my projects since WAY back in the day when scrapbooking was all about the stickers and not much else.  At any rate, I had fun trying to think of interesting things to do with these darling winter stickers from Echo Park.  Here I made a card using a set, and I stuck them to Clear Cardstock that I cut and "frosted" with some white Staz On ink. You can purchase the patterned paper as well as these stickers right here.


I popped up the card "window" using Pop Dots that I hid behind the stickers.  The twill ribbon and Aqua Mist cardstock are from Papertrey Ink. The border punch is from Martha Stewart.


Thanks for stopping by today...and here's sending you "Warm Winter Wishes!"

Wednesday, December 15, 2010

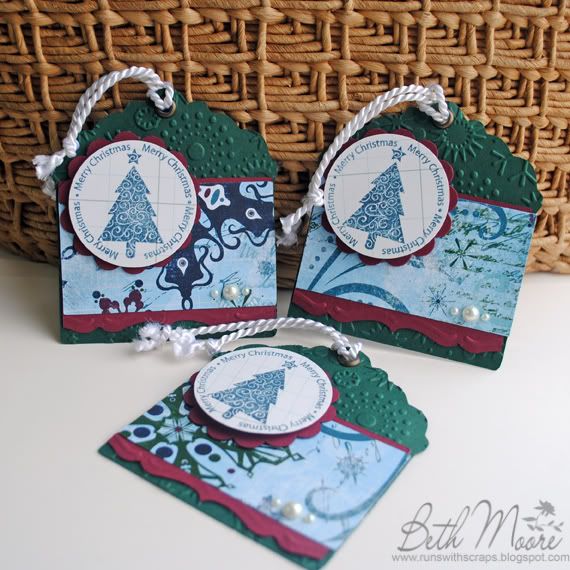
Tag Trio from the Midnight Frost Collection by Bo Bunny

Hope everyone is enjoying their day! This is just a quick post to share a simple little trio of tags I created earlier this month using the Design Team kit from Memorable Seasons. I failed to complete a full supply list (eek) like I normally do... but I will say that the pattened paper is Bo Bunny's Midnight Frost Collection and available for purchase at the store right here.


The tags also feature pearls by Hero Arts, Cardstock and stamped sentiment from Papertrey Ink, a Cuttlebug snowflake embossing folder to create the texture, as well as white cording and eyelets from my stash.

I also made the tags using my Cricut...but I can't remember which cartridge I used! What was I thinking when I didn't write this stuff down? Bad papercrafter, bad.

Sunday, December 12, 2010

I'm Stuck on Echo Park Wintertime Collection Kit from Memorable Seasons!

Here I am ... still creating cards to finish my holiday card list! I gotta admit though, this year it's been so much fun making cards with the fantastic Echo Park Wintertime Collection kit I received from Memorable Seasons as a member of the Design Team!

This is yet another card I created using stickers! A new thing for me, and wow, I am so loving how easy a card can come together with the help of a nicely placed sticker or two! Yee Haw!


This also happens to be yet another card I've made using inspiration I found at Ashley Newell's blog.  I love that gal and her awesome card creations! She's a Rock Star in my book.  I was really drawn to her design that included combining the rustic-look of baker's twine with the more elegant sheer ribbon on this card that she made right here. 

Instructions: 
  1. Create card base from red cardstock 4 ¼ x 5 ½.
  2. Cut cream cardstock 4 x 5 ¼ to create card front and adhere sticker.
  3. Stamp sentiment onto card front.
  4. Cut strip from Kraft paper, wrap with twine. Adhere to card front.
  5. Wrap ribbon (x 3) around card front and tie into bow.
  6. Adhere to card base.
Supplies Used:
Cardstock: Papertrey Ink: “Rustic Cream”,“Pure Poppy”, “Kraft”
Ink: Hampton Art: Chalks Pigment Ink “Red” (ID# VP0018R)
Stamps: Hero Arts: “Merry Christmas Trees”
Fiber: Jillibean Soup: Bean Stalks “Red Twine”, Darice Inc. Ribbon: “1/4 inch Chiffon White”
Embellishments: Echo Park: “Wintertime Element Stickers”

Friday, December 10, 2010

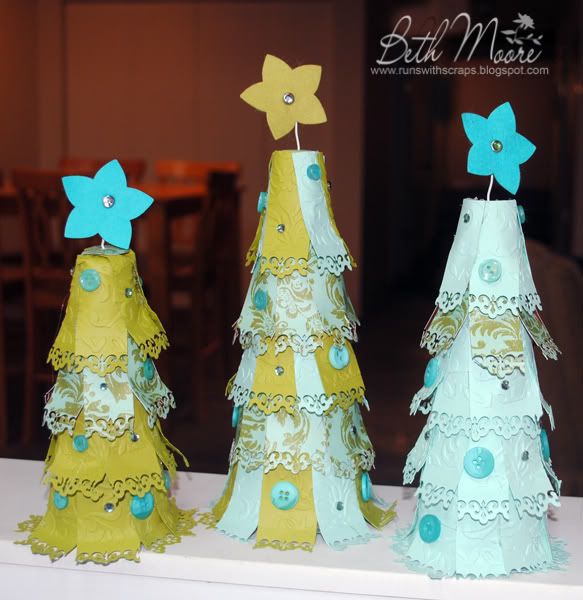
Paper Christmas Trees

I found the cutest Christmas tree project over at Scrapbooks, Etc. (It is also on the last page of their print magazine for this month).  So I knew I wanted to create some of my own with the Memorable Seasons Design Team kit I received this month.  You can purchased the patterned paper I used on the trees from the store right here.


I cut the patterned paper and cardstock (in Simply Chartreuse and Aqua Mist from Papertrey Ink) into 1 1/2 and 1 inch strips, then I cute those into 2 1/2 inch long pieces, border punched a short end and ran all those little pieces (five at a time) through my Cuttlebug with an embossing folder. (That took awhile... eeek!)... Then I attached all the strips in layers going up each foam base. I added buttons and bling for ornaments and cut felt stars for the tree toppers.  It actually was a fun project, except for all the embossing...  :-) Perhaps the reason why the "example" trees in the magazine didn't use embossed pieces! :-)

Thursday, December 9, 2010

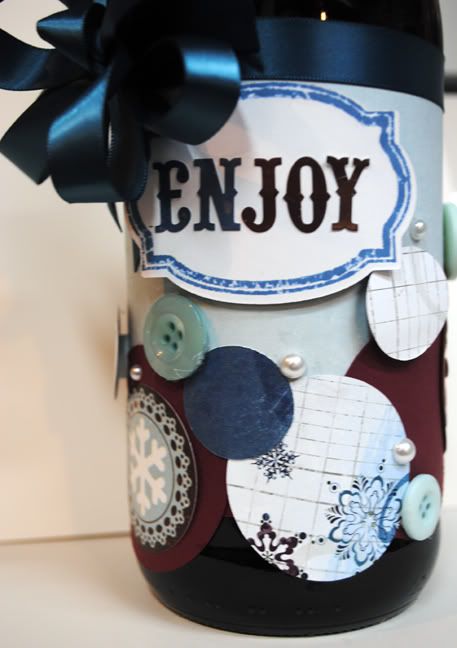
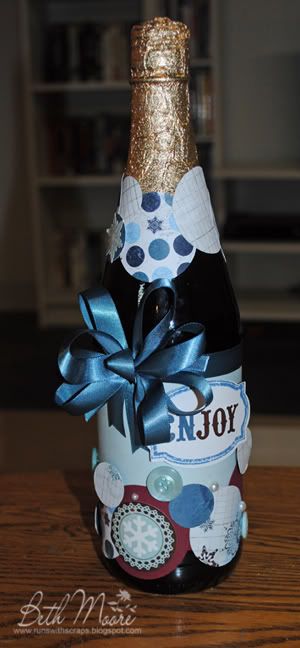
Another Take on the Sparkling Wine Bottle Cover

All of the products I received in the Memorable Seasons Design Team kit box kept me busy for a few days creating cards and projects.  I got the idea for this particlar take on the wine bottle cover from a papercrafting magazine... (eeek, I think it was Papercrafts... but don't hold me to that)... at any rate, it was quick, easy and fun to make!


I think I could get addicted to creating bottle wraps for these sparkling wine bottles... it's just such a great hostess gift, and they are so fun to put together.  This one simply combines a strip of patterned paper cut to fit all the way around the bottle with various sized punched circles of coordinating patterned paper.  Add a sentiment label, a bow and some buttons and gems and .... ta-da. You are have a cute gift!


Supplies Used:

Cardstock: Papertrey Ink: “Stampers Select”

Patterned Paper: Echo Park: “Wintertime Collection Kit” (ID# WT7016)
Ink: Ranger: Distress Ink “Faded Jeans”
Stamps: Papertrey Ink: “Fillable Frames”
Fiber: Papertrey Ink: Satin Luxe Ribbon “Enchanted Evening”
Embellishments: Echo Park: “Wintertime Element Stickers”
Other Tools: Provocraft Cricut: “George” cartridge, buttons and pearls from stash

Wednesday, December 8, 2010

Scalloped Christmas Tree Card with Memorable Seasons Products

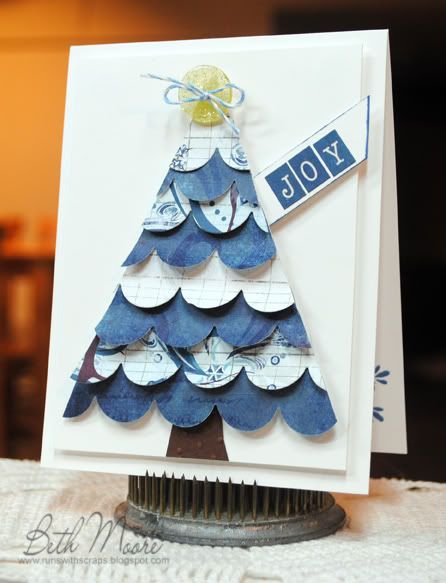
I created this cute scalloped Christmas tree card using the Bo Bunny Midnight Frost Collection from my Memorable Seasons Design Team kit.  You can buy the Bo Bunny products I used to create this card right here at the Memorable Seasons store.

I even used a few more stickers (yes, AGAIN) to create the sentiment tag.


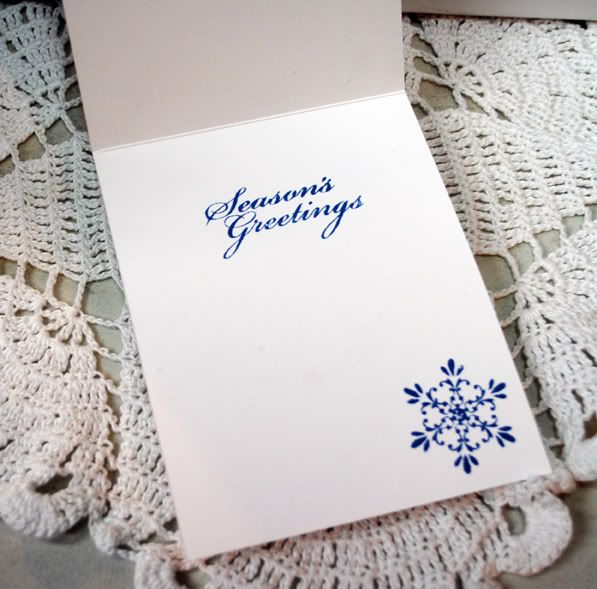
I also finished off the inside of this particular card AND actually remember to take a photograph of the inside as well... oh happy day!! :-)


 By the way, Tim Holtz Distress Ink in "Faded Jeans" matches the Bo Bunny Midnight Frost Collection perfectly!

And to make your own card follow me... 
  1. Create card base from white cardstock 4 ¼ x 5 ½
  2. Cut card front from white cardstock 3 ¾ x 5 and adhere with Pop Dots
  3. Cut triangle from white cardstock with Cricut
  4. Cut 8 strips of 1 inch patterned paper with scallop die cut.
  5. Layer onto triangle and trim as shown.
  6. Hand-cut tree truck from brown cardstock, emboss and adhere to card front.
  7. Adhere tree to card from with Pop Dots.
  8. Tie button with twine and adhere to tree.
  9. Cut sentiment tag, adhere stickers, ink edges and adhere to card front as shown.
  10. Stamp sentiment and snowflake on inside of card.
and I used these supplies to create my card:

Cardstock: Papertrey Ink: “Stampers Select White”, “Dark Chocolate”
Patterned Paper: Bo Bunny: Back to Basics “Midnight Frost Collection”
Ink: Ranger: Tim Holtz Distress Ink “Faded Jeans”
Stamps: Hero Arts: “Merry Christmas Trees”
Fiber: Jillibean Soup: Bean Stalks “Blue Twine”
Embellishments: Echo Park: “Wintertime Element Stickers”, Dear Lizzy and American Crafts: “Glitter Buttons”
Other Tools: Papertrey Ink: Die Cut “Medium Scallop Border”, ProvoCraft: Cuttlebug Embossing Folder “Swiss Dots”, Cricut Expression Electronic Die Cut Machine and Cartridge “Plantin SchoolBook, Plaid: All Night Media “Pop Dots”

Tuesday, December 7, 2010

You can't make a cute card without...

a lot of money to spend on embellishments or without spending hours making one...

OR CAN YOU??!!!!

Yes....Yes you can! 

Okay, now this sticker thing is getting to be a real "habit" for me.  I created this card using more products from the Memorable Seasons Design Team kit...you can buy many of these products I have been using to create my Christmas cards this year right at the store. With just four Bo Bunny Stickers from the Midnight Frost Collection and few pieces of cardstock, a touch of twill, a dab of ink... you can make this cute winter card in minutes flat... really! And if I were a betting man, I'd bet this card doesn't have much more (maybe less!) than a $1.00 worth of supplies on it... give or take a penny or two.


It was so quick and easy I even finished off the inside of the card with some white cardstock and a stamped sentiment and snowflake...but GAK... I forgot to take a photo and I already gave the card away! eek.

Quick and Easy Instructions: 
  1. Create 5 x 5 inch card base from Kraft Cardstock and ink edges
  2. Wrap with ribbon and tie into bow.
  3. Cut 4 x 4 inch card front from white cardstock
  4. Apply stickers.
  5. Adhere to card front.
Supplies Used:
Cardstock: Papertrey Ink: “Kraft”, “Stampers Select White”
Ink: Staz On “White”
Fiber: Papertrey Ink: Twill Ribbon “Snow White”
Embellishments: Bo Bunny: Midnight Frost: “Snow Play Cardstock Stickers”
(ID# 10SP090)

Thursday, December 2, 2010

Be Merry You Sticky Little Snowman...

When I think of stickers, I usually envision them on scrapbook layouts, not cards. (Actually, I don't really even use them that often on layouts)... But when I received  my December Design Team kit for my Memorable Seasons DT gig, it included a whole heck of a lot of darling stickers... but I just didn't have winter photographs to scrap, so I decided to add them to some cards I was making.  Why didn't I think of that before!!??  It really turned out to be a fun way to quickly create a bunch of really cute cards (if I do say so myself!) :-)

For this oh-so-sweet snowman card.. I used Element Stickers from Echo Park's Wintertime Collection Kit that you can purchase at the Memorable Seasons store right here! 


Isn't this guy a little cutie-pie! I love him and he fit perfectly on the large circle and scallop die cuts I used too! Big plus there! One holiday card made... a million or so left to go before I am done with my Christmas Card list... (good thing I love this whole papercrafting thing huh!?). 

Super Simple Instructions:
  1. Create card base from Kraft cardstock 5 x 5 inches and round both corners on right side.
  2. Cut patterned paper strip, wrap with twine and tie into a bow. Adhere to card front.
  3. Stamp sentiment in red ink.
  4. Die cut scallop circle from red cardstock and circle from blue cardstock. Adhere together.
  5. Apply Sticker to circle and adhere to card.
Supplies Used:
Cardstock: Papertrey Ink: “Kraft”, “Pure Poppy”, “Aqua Mist”

Patterned Paper: Echo Park: “Wintertime Collection Kit” (ID# WT7016)
Ink: Hampton Art: Chalks Pigment Ink “Red” (ID# VP0018R)
Stamps: Hero Arts: “Merry Christmas Trees”
Fiber: Jillibean Soup: Bean Stalks “Red Twine”
Embellishments: Echo Park: “Wintertime Element Stickers”
Other Tools: Spellbinders: Nestabilities, Large Scallop and Circles die cuts, Corner Chomper

Wednesday, December 1, 2010

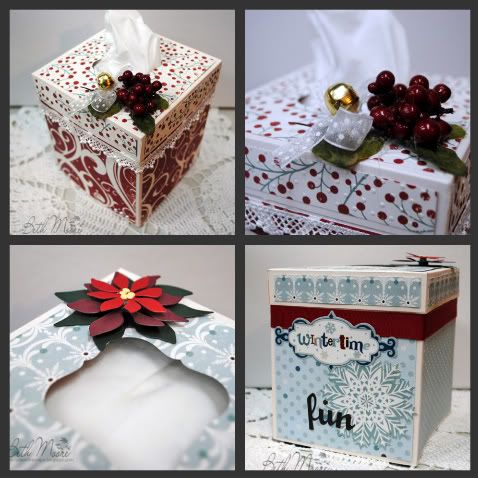
Tissue Box Covers with Memorable Seasons Store Products

As a member of the Memorable Seasons Design Team, all the designers receive a Design Team kit filled with products available at the Memorable Seasons online store. During the rest of the this month, all of the Memorable Design team will be posting projects we designed using the kit. You don't have to wait for them to be posted on our blogs however, as they are available for viewing at the Memorable Seasons Forum and Gallery. The kit reveals take place on the forum on the first day of each month. Visiting the forum is a great way to get a whole lot of product inspiration in one place. I hope you have time to visit us there!

Two of the first projects I created were these super-cute tissue box covers. You can see a full tutorial about how to create your own at Split Coast Stampers.


The poinsettia on the blue tissue box cover is a gorgeous die cut from Cheery Lynn Designs, a division of Dies Direct.  You'll be seeing a lot more of these die cuts on all my projects, because not only am I a new member of their Design Team...  I am also totally smitten with their die cut products already, even though I have only worked with a small handful of the dies so far.  I love the "texture" that the dies create when I use them in my Cuttlebug, and they are so cleverly designed that you can get an enormous amount of variety from just one set... but you'll see what I mean as I reveal the products I've created for them this month here on my blog... so stay tuned! :-)

Supplies Used (Blue Tissue Box Cover)
Cardstock: Papertrey Ink: “Pure Poppy”, “Pine Feather” “Lemon Tart” “Scarlet Jewel”
Patterned Paper: Echo Park: “Wintertime Collection Kit” (ID# WT7016)
Fiber: Papertrey Ink: Twill: “Scarlet Jewel”
Embellishments: Echo Park: “Wintertime Element Stickers”
Die Cuts: Dies Direct: Cheery Lynn Designs “Poinsettias 2”
Other Tools: ProvoCraft: Cuttlebug Embossing Folder “Swiss Dots”

Supplies Used (Red Tissue Box Cover)
Cardstock: Papertrey Ink: “Pure Poppy”, “Pine Feather” “Lemon Tart” “Scarlet Jewel”
Patterned Paper: Echo Park: “Wintertime Collection Kit” (ID# WT7016)
Fiber: Prima Marketing: Prima Lace (ID# 541392)
Other Tools: ProvoCraft: Cuttlebug Embossing Folder “Swiss Dots”, Swiss Dot ribbon, bell and berries with leaves from stash

Friday, November 12, 2010

Memorable Seasons Design Team News!


Ah, the day has finally arrived that I can announce my selection to the Memorable Seasons Design Team! You can read the official announcement at the Memorable Seasons Forum right here.  (This would be a great time for you to join us on the forum too!) I've been so looking forward to becoming an "official" member of the team and I'll be posting projects for the Design Team beginning in December.

Memorable Seasons is a Scrapbook Store (with fabulous prices I might add!) and Community. You can visit the store right here, the forum right here and the awesome gallery filled with inspiration right here.

While I'm on the subject of Memorable Seasons... I also want to pass on some news that will be sure to save you lots of cash on your scrapbooking supplies!  Don't forget to mark your calendars for next week's BEST EVER BLACK FRIDAY SALE! Jill (owner of Memorable Seasons) has been feverishly working and marking down items for this special sale, you will not want to miss it! The sale will start Thursday November 18, at Midnight CST. Check out this link for a countdown clock to remind you!

I can't wait to get to know everyone over at Memorable Seasons... and I hope you join us there!
Related Posts Plugin for WordPress, Blogger...